|
STEPHANIE ZONIS focuses on good foods and the people who produce them.
|
|
March 2006
Updated July 2008
|
|
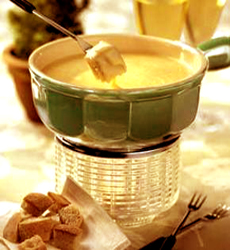
Melting Cheeses For Fondue, Cheese Sauce & More
Part I: The Technique Of Melting Cheese
This is Part 1 of a three-part article on melting cheeses. Click on the black links below to read the other parts.
Overview: Crazy From The Heat
Who among us has not succumbed to the siren song of melted cheese? Lusciously gooey and rich, it defines pizza and nachos, forms the basis of fondue, and is the raison d’etre of the humble but beloved grilled cheese sandwich. But all of these dishes require the exposure of cheese to heat, and cheeses can be persnickety in that regard. Let’s talk a little more about the fine art of properly melting cheese.
When I talk about cheese, I refer, of course, to real cheese, not any of the processed, so-called “cheese food” that is a blight upon our fair land. The United States’ largest manufacturer of such a product claims that it “melts better than Cheddar.” I’m sure that their product can tolerate more exposure to heat for a longer time than can genuine cheddar, but that’s the difference between an ultra-processed food and the real deal. Cheddar is a great melting cheese, but the melting must be done with a little care.
Melting 101: How To Melt Cheese
In fact, melting technique is important to all cheeses. Cheese is high in fat, so it responds quickly to heat, but it’s also high in protein, so high heat, or exposure to heat for too long, denatures the proteins and toughens cheese; too much heat can also make cheese stringy.
- Cheese should be shredded, grated, sliced, or chopped into small pieces before you melt it. (Please, please, don’t use preshredded cheese! It is a matter of a few quick swipes against a grater to shred your own, and the packaged stuff you buy without a second thought often has preservatives in it.)
- Use a low-to-medium heat, keeping it on the heat just until melted.
- In thinking about nachos, quesadillas, or pizza, cheese is so temperature-sensitive that the microwave is not my preferred method for melting it in or on these foods. It’s all too easy to overheat foods in a microwave, and those appliances are notorious for “hot spots”, even when they contain carousels or the food is rotated halfway through heating time.
- With a little attention and the more even heat of an oven, cheese melts beautifully, and I don’t find any hard or crusty spots of overheated cheese.
- If you’re going to use cheese as a topping, again, I prefer the oven or broiler to the microwave. For optimum flavor and texture, add the cheese toward the end of cooking time, and don’t overheat it.
You also have to choose the right cheese to melt. I’ve already mentioned cheddar as a great melting cheese. Other popular cheeses in this category include mozzarella, the French tomme d’Abondance, and a young Manchego, but there are a whole range of good “melters.” Many have a semi-hard (also known as semi-firm) texture. In addition, there’s the issue of fat content, variations in which cause significant differences in the melted product.
- Reduced fat cheeses melt decently in some instances, but fat-free cheeses won’t melt anywhere near as nicely as will full fat types, because fat, in addition to providing some protection from heat, allows for the beautifully smooth viscosity, or thickness, of melted cheese.
- If you’re enjoying melted cheese as a filling in a toasted sandwich, it also pays to be mindful about method. In a grilled cheese sandwich, you want the exterior bread slices toasted and the cheese in the middle fully melted. My solution? Use bread slices no thicker than about half an inch, and again, be sure you shred, grate, or thinly slice your cheese—and don’t pile it too high.
- Whether you use a nonstick pan or a traditional pan with a little melted butter, keep the pan over low heat, and cover it with a pot lid for a few minutes. This covered “chamber” keeps in enough heat to melt the cheese a little more quickly. Watch that the bottom of the sandwich doesn’t burn. When it achieves the degree of toasting you wish, remove the pot lid and flip the sandwich over, leaving it uncovered. Toasting will proceed more rapidly once you’ve flipped the sandwich, so watch it carefully.
Continue To Part II: Cheese Sauces & Fondue
Go To The Article Index Above
Lifestyle Direct, Inc. All rights reserved. Images are the copyright of their respective owners.
|